안녕하세요. Jay입니다.
오늘은 원형 프로그래스 바를 구현해보겠습니다.
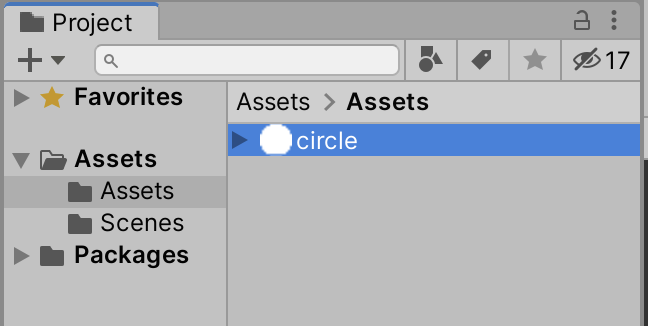
1. 먼저 투명 배경의 원형 이미지를 준비합니다.
해당 이미지를 유니티 assets 폴더에 넣습니다.
2. 캔버스를 추가합니다.
캔버스를 추가한 후, 캔버스의 자식으로 empty game object를 추가합니다. 그리고 empty game object를 'CircularProgressBar'로 이름을 짓습니다. 아래 이미지와 같은 구조가 됩니다.

3. Loading Bar를 추가합니다.
3-1. CircularProgressBar의 자식으로 이미지를 추가합니다. 이미지 이름은 LoadingBar로 짓습니다.
3-2. LoadingBar 이미지의 'Source Image'를 assets에 추가한 circle.png로 변경합니다.
3-3. LoadingBar의 색상을 빨간색으로 변경하고, width와 height를 150으로 변경합니다.
3-4. LoadingBar 이미지의 'Image Type'을 'Filled'로 변경합니다.
3-5. LoadingBar 이미지의 'Fill Method'를 'Radial 360'으로 변경합니다 (참고로, 저는 Fill Method의 기본값이 'Radial 360'이었습니다).
3-6. LoadingBar 이미지의 'Fill Origin' 값을 'Top'으로 변경합니다.
'Fill Amount' 값은 0에서 1사이 값을 가질 수 있습니다. 아래 동영상과 같이 값을 변경하면 값에 따라 색이 채워지는 것을 확인할 수 있습니다.
4. Center를 추가합니다.
4-1. LoadingBar 이미지를 복제합니다. 그 복제된 이미지를 Center로 이름 짓습니다.
4-2. Center 이미지의 Width와 Height를 각각 100으로 지정합니다.
4-3. Center 이미지의 색상을 흰색으로 변경합니다.
지금까지 잘 따라오셨다면, 아래와 이미지와 같이 되었을 것입니다.

5. 진행률을 알 수 있도록, Progress Indicator를 추가합니다.
Center 이미지의 자식으로 Text를 하나 추가합니다. 그리고 해당 Text를 ProgressIndicator로 이름 짓습니다. 중앙에 정렬도 잘 해주세요. 초기 Text 값은 '0%'로 합니다.

6. RadialProgress 스크립트를 추가합니다.
6-1. RadialProgress라는 스크립트를 추가하고, CircularProgressBar Game Object에 추가합니다.
6-2. 아래와 같이 스크립트를 작성합니다.
using System.Collections;
using System.Collections.Generic;
using UnityEngine;
using UnityEngine.UI;

public class RadialProgress : MonoBehaviour
{
    public Text ProgressIndicator;
    public Image LoadingBar;
    float currentValue;
    public float speed;

    // Start is called before the first frame update
    void Start()
    {

    }

    // Update is called once per frame
    void Update()
    {
        if (currentValue < 100)
        {
            currentValue += speed * Time.deltaTime;
            ProgressIndicator.text = ((int)currentValue).ToString() + "%";
        }
        else
        {
            ProgressIndicator.text = "Done";
        }

        LoadingBar.fillAmount = currentValue / 100;
    }
}
6-3. Public 변수들을 드래그 앤 드롭으로 할당하고 speed 변수는 25로 세팅합니다.

7. 프로그램을 실행해봅시다.
간단한 Circular Progress Bar를 구현해보았습니다.
완성된 샘플은 아래 Github에서 확인 할 수 있습니다.
https://github.com/hjleesm/CircularProgressBar
hjleesm/CircularProgressBar
Contribute to hjleesm/CircularProgressBar development by creating an account on GitHub.
github.com
참고:
http://gyanendushekhar.com/2017/03/28/radial-circular-progress-bar-unity3d/
Radial/ Circular Progress Bar in unity3d - Gyanendu Shekhar's Blog
This tutorial explains how to create circular progress bar in unity3d. IDE/ Engine used for this demo: Unity 5.4.1f1 personal
gyanendushekhar.com
'Unity' 카테고리의 다른 글
| [Unity] sprite 동적으로 변경하기(Resources.LoadAll) (1) | 2020.07.03 |
|---|---|
| [Unity] tag 비교하기('CompareTag()' VS '== tag') (0) | 2020.04.12 |
| [Unity] Coroutine VS Invoke (0) | 2020.04.11 |
| [Unity] Update() vs FixedUpdate() (0) | 2020.04.09 |